Eggs Crack When Boiling? Here’s Why
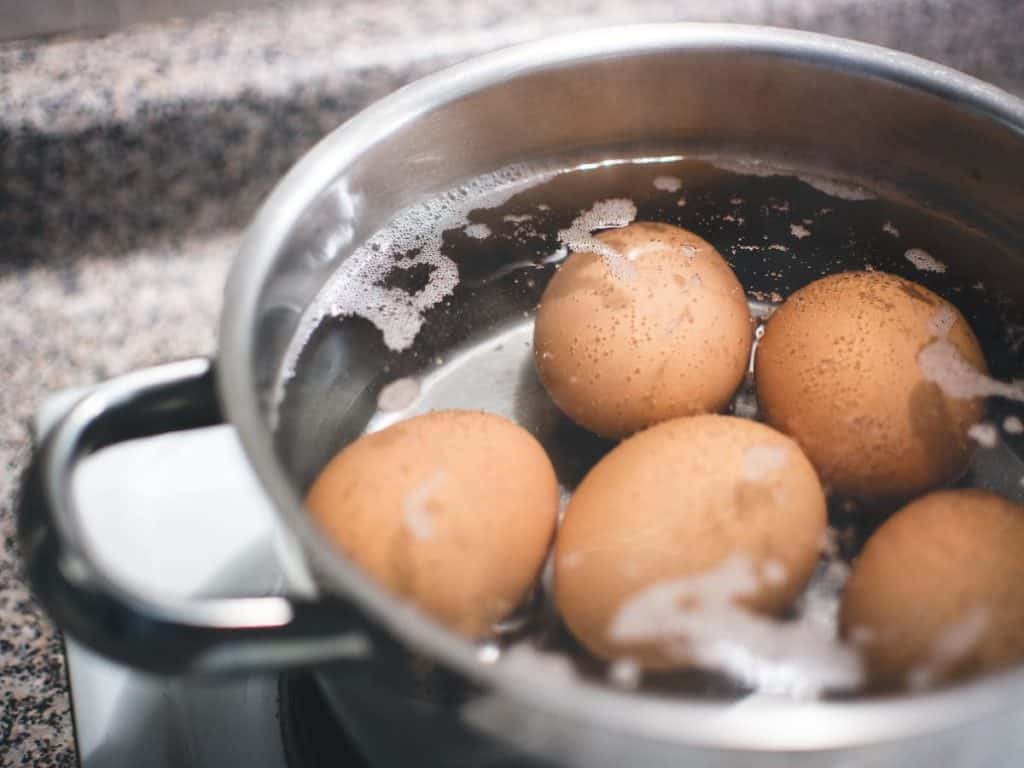
Boiling eggs has to be one of the most deceiving cooking methods out there. It sounds simple, right? You put raw eggs in boiling water. Yet there are many ways to mess it up. For example, have you had your eggs crack when boiling them? Why do eggs crack when boiling?
There are two main reasons eggs crack when boiling. The most common reason is air within the egg. As you heat the eggs, the air inside expands. As the air expands, it pushes against the egg from the inside. Eventually, the egg cracks from the pressure.
Eggs that crack when boiling are still safe to eat, but it can ruin the look. It can also lower the nutritional quality of the egg because some of the contents can leak out. Below you can learn the other reason eggs crack plus a minor reason. You can also learn how to keep eggs from cracking when boiling.
Why Eggs Crack When Boiling
As mentioned earlier, a reason eggs crack when boiling is the air within it. Under the shell are two membranes with an air sack in between. This air sack has breathable oxygen. In an egg with a developing bird, the fetus breathes this oxygen in. Over time, the oxygen level goes down, so the oxygen in the air sack needs to be replenished.
The egg refills its air sack by letting in more air and letting carbon dioxide out. It’s able to do so because the egg itself isn’t impermeable. It has microscopic pores all over the shell. Air is able to go through these pores to refill the air sack.
When you heat the eggs, the heat raises the pressure within the egg. As the pressure goes up, the air pushes against the eggshell. Some will be able to go out through the pores, but much of the air will push against the shell. Each pore will be like a traffic bottleneck. Eventually, the pressure becomes too much and the shell cracks.
Aggressive Boiling
Another reason the eggs crack is the boiling is too aggressive. When you boil water, bubbles form. If the heat is high, many bubbles form quickly. These bubbles can push the eggs in all directions. The eggs can collide with each other or the cooking vessel, leading to cracks.
Cracks Already Present
A minor reason eggs crack when boiling is that they already have cracks in the first place. The cracks may be microscopic, so you can’t see them.
A small force that might not crack an intact egg can enlarge those microscopic cracks. That force can come from the air pressure buildup from the heat or from the aggressive bubbling.
How To Prevent Eggs From Cracking
Now that you know why the eggs crack, you can address the reasons to prevent it. The first way is to remove the air inside the eggs. The second way is to gently boil them. Read more below on how to do these two ways. You’ll also find how to check for cracks.
Remove The Air Inside The Eggs
You now know that the pressure buildup from the air inside the egg causes cracks. Hence, you want to remove that air before boiling the egg. You can do that by submerging the egg in water for 15 or more minutes.
Put the eggs in the cooking vessel where you will boil them. Fill it with water. Make sure the eggs are completely submerged. Since air is lighter than water, when the egg is submerged, the air will want to come to the surface. The air will exit the pores while water seep in. You know that is happening when you see tiny bubbles on the egg surface.
After that time, then you can put the vessel on the stove and begin heating it.
Simmer Or Turn Off The Heat
Since the aggressive bubbling can cause the eggs to collide and crack, you want to avoid that. As you begin cooking the eggs, put the heat on high. Once you get a rolling boil, reduce the heat to low and simmer. Simmer for at least 3 minutes.
You can also turn off the heat. Let the eggs sit in the hot water for at least 3 minutes.
Check For Cracks
Here’s a step that you can do before you buy the eggs. Whether you’re at a grocery store or a farmers’ market, check the eggs for cracks. Egg candling is a method for checking cracks. You shine a bright line onto the egg.
The egg isn’t completely opaque, so some light will pass through and the egg will shine. But the cracks will appear brighter. You can use the flashlight feature on your phone for egg candling. There are different cracks for which to watch out.
Gross Cracks
These cracks are obvious. Gross cracks are holes and shattered eggshells.
Hairline Cracks
Hairline cracks are fine cracks that usually run along the length of the shell. They resemble the lines on maps, veins, or lightning.
Star Cracks
Star cracks are fine cracks that radiate outwards from a central point. The central point is the point of impact and is often slightly indented.
How To Check If Eggs Are Still Good
Besides cracks, there are other things for which to watch out to check if the eggs are still fresh.
Check For Sliminess
Slime on the shell can be a sign of bacterial contamination. Bacteria can deposit on the eggshell from the environment. A common way for bacteria to get on the egg is from the chicken feces. Chickens release the eggs from the cloaca.
If you recall your basic biology, the cloaca is also where poop comes out. In a way, chickens also poop out the eggs. So bacteria that are normally found in the feces can get on the egg as the chicken lays it. Other ways for bacteria to get on the egg is from poor handling and from other animals, like rodents.
Some bacteria don’t cause any obvious signs like slime. So they can be on the shell without you ever knowing. So rinse the eggs with warm water.
After rinsing them, put them in the refrigerator immediately. The cold temperature can keep the bacteria from multiplying. When you cook your eggs, cook them properly to kill any remaining bacteria.
It can be a bad idea to eat raw eggs. As soon as you crack them open, the insides can be contaminated by bacteria on the shells. Besides, cooking the eggs makes the nutrients more readily absorbed by the body. Cooking the eggs changes the chemical structures of the proteins. The result is our body can absorb the proteins better.
Salmonella
While we’re on the topic of bacteria, one that is of concern is Salmonella. Salmonella infection symptoms can include diarrhea, vomiting, fever, and abdominal cramps.
According to the US Centers for Disease Control and Prevention, these symptoms can appear as early as 6 hours of infection. But they can also appear as late as after 6 days. Some people can have diarrhea many times a day for several days and the sick person may need to be hospitalized.
While typical Salmonella infection isn’t life-threatening, it isn’t fun either. Hence, you always want to avoid it. Unlike other bacteria, Salmonella doesn’t show obvious signs like sliminess. So if there are any on the shell surface, avoid it by properly cleaning, keeping, and cooking the eggs.
What is worse is that Salmonella may already be inside the eggs. How do they get in there?
They got in there as the egg was being formed. The hen can be a carrier of Salmonella. She won’t have symptoms, but she has the germ. As her body makes the eggs, the germ can get inside before the shell is formed.
When you crack an egg with Salmonella, everything will look, smell, and taste okay. The reason is that Salmonella doesn’t show signs of spoilage. This danger is even more reason to properly cook your eggs.
You may be asking yourself, “But don’t the shells have pores? Can’t the bacteria go through those?” Yes and no. The shells have pores, but beneath the shell is a membrane. Air can pass through the membrane, but bacteria can’t.
Related Article: Does Freezing Kill Salmonella?
Check for Powders
A powdery material on the eggshell surface is a sign of mold contamination. The powder may look anything between green and black. It may even look like hair. Mold can form in humid conditions.
To avoid mold growth, store your eggs in the refrigerator. If you won’t store them in the refrigerator yet, then keep them in a cool, dry, dark place.
Ways To Boil Eggs
Now you know how to prevent your eggs from cracking and how to check for bad ones. It’s now time to know the different ways to boil your eggs.
Hard-Boiled Eggs
As simple as it sounds, making hard-boiled eggs can be tricky. Here is a simple way to get great hard-boiled eggs.
Get your cooking vessel. Put your eggs in it and fill it with water. Make sure the water is over the eggs by at least an inch. Put your eggs on the stove under high heat. Once you get aggressive bubbles, turn off the heat. Let the eggs be for 10 to 12 minutes. After that time, remove the eggs from the water and let them cool.
This method isn’t fixed. The results can vary depending on many factors, like your altitude and the quality of your eggs. So it can take time and lots of trial and error before you can consistently make great hard-boiled eggs. If you live at a high altitude, you may want to let the eggs sit in the hot water for longer. You can also reduce the heat to a low simmer instead of turning it off.
A sign that you overcooked your eggs is a greenish top layer or coating on the yolk. This green color is a result of the sulfur in the egg white reacting with the iron in the yolk. They form a compound called ferrous sulfide, which is green.
You’ll only find out if you overcooked your eggs when you peel off the shells and check the yolk. The eggs will have some taste and smell of rotten eggs even though they’re freshly cooked. The eggs will still be safe to eat though.
Soft-Boiled Eggs
Making soft-boiled eggs follow the same process. The main difference is that you cook the eggs for a shorter amount of time. You keep the eggs in the hot water for between 2 and 8 minutes. Keeping the cooking time short will still give the egg white a texture like that of custard.
The yolk, however, will be liquid or runny. Like with hard-boiled eggs, mastering soft-boiled eggs will take trial and error.
You can’t really overcook soft-boiled eggs. If you ‘overcook” them, you’ll end up with hard-boiled eggs.
Piercing The Egg
Some people prick or pierce the egg with a needle before boiling it in water. If you want to do this, you’ll need to pierce the large or blunt end of the egg. The air sack is at this large or blunt end. By piercing it with a needle, you are releasing the air. Hence, you can prevent any air pressure buildup while boiling.
If you use this method, you will notice a jet of air shooting out the part you pierced during boiling. The small hole also lets water in between the shell and the membrane beneath it. This result can make peeling the shell off more easily.
However, some people do not recommend piercing the egg. Some say that piercing the egg can make it likelier to crack. After all, you’re introducing a crack to it. The American Egg Board also do not recommend piercing the egg. According to them, piercing the egg raises the chance of introducing bacteria.
Putting The Eggs In Hot Or Cold Water
Some put the eggs in cold water and heat both together. Others put the eggs in boiling water. You can do either. Each has its advantages and disadvantages.
When you cook egg white for a long time, they get a rubbery texture. If you start with cold water, you heat the egg more slowly. In this way, you keep the egg white from turning rubbery. This method takes longer though, and it gives you less control over the cooking time.
If you put the eggs in boiling water, you have more control over the timing. But you have higher chances of turning the egg white rubbery.
This method also has higher chances of getting cracked eggs. The air inside the eggs will quickly heat up. Pressure will build up fast and there won’t be enough time for the air to escape.
How To Store Boiled Eggs
A great thing about boiled eggs is you don’t have to eat them immediately. Plus, their shell acts like a natural container for them. Unpeeled boiled eggs can be stored in the refrigerator. You can put the boiled eggs in a container to separate them from the raw eggs.
You can also do the same for peeled boiled eggs. But you can make them last longer if you put the peeled eggs submerged in a container of water. Just change the water every day. Both peeled and unpeeled boiled eggs can last for about week in the refrigerator.
After that, they can start developing off-flavors.